Review Date: July 3, 2012
Category: Beginner to Serious Amateur

Photoxels Gold Award – Interchangeable Lens Camera
HANDLING & FEEL
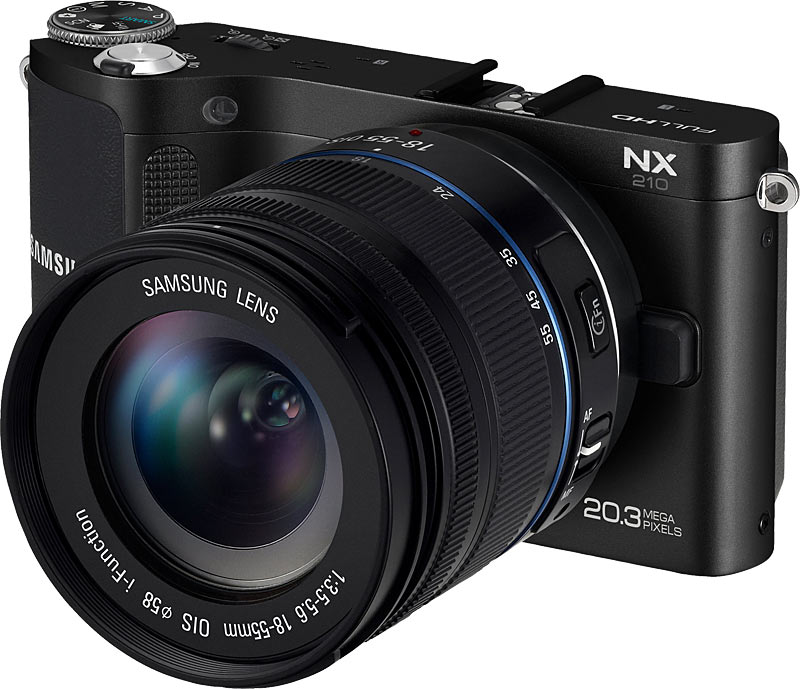
The Samsung NX210 retains the body design and construction of the NX200 with a handgrip and textured surfaces. The construction is a combination of magnesium alloy and plastic so that the camera feels solid without being heavy. The build quality is very good.
As with any Interchangeable Lens Camera, holding the NX210 is a two-handed affair. The best way to hold and carry the NX210 safely is with your left hand under the camera and around the lens barrel.
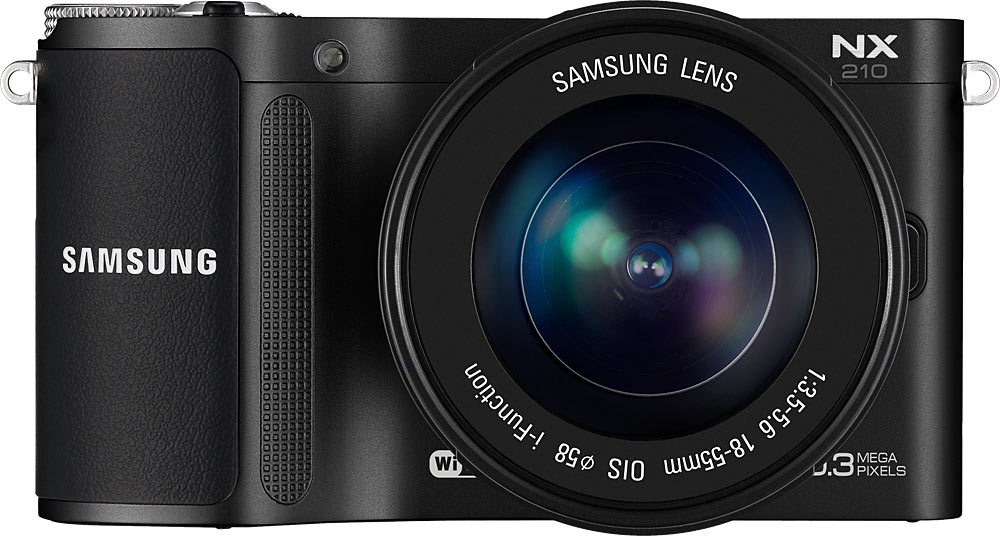
The front of the camera is beautifully sparse: An AF-assist light/Timer lamp on the left side of the lens and the Lens removal button on the right side.
A new 18-55mm (27-84mm equiv.) F3.5-5.6 III OIS portrait kit lens is included with my review camera. It has a manual zoom ring as well as a manual fly-by-wire focus ring. Turn the focus ring and the screen display enlarges for a better view if MF Assist is turned to ON [MENU – Camera 2 – MF ASSIST – Enlarge x5 or x8 or FA]. It’s by far the best fly-by-wire AF yet with the focus ring perfectly synched to the focus so that it almost feels like you are using a manual focus ring. The kit lens is optically image stabilized.
Samsung is standardizing the Lens Priority mode (aka, i-Function or iFn) on all their new lenses and this kit lens has this feature. There’s a button on the lens barrel labeled iFn. This button acts, as its name implies, like a Function button: press it and a Quick Menu appears on screen. You can then use the lens focus ring (and/or Jog Dial) to set an exposure setting depending on what shooting mode you’re in. The purpose for the Lens Priority mode is to allow the photographer to select an exposure without having to reach for a control button: you can leave your index finger on the Shutter Release button while your left hand makes the exposure selection.
For example, if you are in P mode, you can select EV; in A mode, Aperture and EV; in S mode, Shutter Speed and EV; in M mode, Aperture and Shutter Speed; and in iFn mode (selected on the Mode Dial), a Scene mode or iZoom.
[Note that when the iFn on the lens is activated, the Smart Dial (4-Way Controller) reverts back to navigating between the major choices available, e.g. Aperture or EV; to actually select an option from one of the major choices (e.g. to select an aperture or to dial in an EV), you use the focus ring or the Jog Dial.]There is an AF/MF button to switch the lens to manual focus on the 18-55 lens. Since the zoom is manual, you can zoom as slow or fast as you wish and zoom (more or less) silently during movie recording. In addition, you can pause a movie recording by pressing OK, recompose to a new scene and then press OK to seamlessly continue the recording on the same clip. If you set the lens to MF, you can manually control the focus during movie recording.
You cannot take a still picture during movie recording, nor can you manually select shutter speed and aperture.
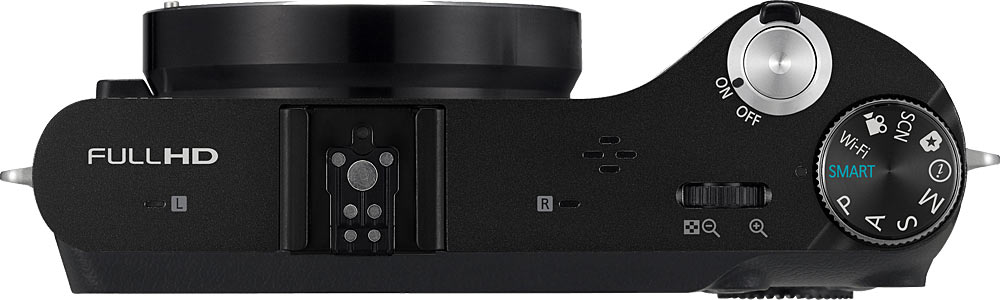
The top of the camera has, from right to left, the Shooting Mode dial, the Shutter Release Button, the Power ON/OFF switch around the shutter release button, the Jog Dial, the speaker (four holes), the Hot Shoe, and the Stereo Microphone (two holes, one on either side of the Hot Shoe).
The Shooting Mode Dial has Smart AUTO, PASM, iFn (Lens Priority Mode), Magic, Scene, Movie and Wi-Fi. The Panorama function has been moved from the MOde Dial (NX200) to the SCN menu (NX210). The Mode Dial can be conveniently and freely rotated in any direction with your thumb and is stiff enough that it will not be easily moved out of its current selection.
The Jog Dial allows you to select exposure settings in the various shooting modes. In Program mode, it allows program shift. In Shutter-Priority and Manual modes, it selects a shutter speed. In Aperture Priority mode, it selects an aperture (you can also use the Smart Dial). In PAS modes, you can also dial in an exposure compensation when the EV button is held pressed in and the Jog Dial rotated. In Manual mode, you can either rotate the Smart Dial or access the iFn on the lens to change the aperture. The Jog Dial also allows you to navigate options in MENU and select a setting when you press the Fn key.
| Shooting Mode | Jog Dial | Smart Dial | iFn on Lens + Focus Ring |
|---|---|---|---|
| P | Program Shift | n/a | EV / ISO/ WB / iZOOM |
| A | Aperture | Aperture | Aperture / EV / ISO/ WB / iZOOM |
| S | Shutter Speed | Shutter Speed | Shutter Speed / EV / ISO/ WB / iZOOM |
| M | Shutter Speed | Aperture | Aperture / Shutter Speed / ISO/ WB / iZOOM |
Shown above are the iFn choices available. You can customize what choices show up when you press the iFN button [Menu – Custom 2 – iFn Customizing].
Do not confuse the iFn on the lens with the iFn mode on the Mode Dial, the latter being the Scene Mode setting: it simply allows you to use the iFN button on the lens barrel to select a Scene Mode. The Scene Mode menu displays on screen and you then use the lens focus ring to select a scene mode. Apparently, the scene modes available are dependent on the iFn-enabled lens attached.
The NX210 does not have a built-in flash. The compact SEF8A flash is a small external flash that is included in the box but unfortunately it cannot be tilted for bounce flash, sorely limiting its usefulness. Other available flash units are: the larger SEF20A (which does enable bounce shooting) and speedlight SEF42A.
When Sensor Cleaning is enabled at Start-Up, startup time is a long 3 sec. (from Power ON to LCD ready for capture, i.e. time-to-first-shot). Shot to shot times is about 1 sec. (@ 10 shots in 10 sec. in M mode, 1/125sec.).
TIP: Disable Sensor Cleaning at Start-Up [Menu – Setup 3- Sensor Cleaning – Start-Up Action – Off ] and see the startup time go down to a fast 1 sec. Do remember to manually run sensor cleaning from time to time and everytime you change lens to ensure no dust particles have entered the camera and found its way onto the image sensor.
In good lighting, there is no practical shutter lag and AF is fast and precise. In low lighting, AF is about 1 sec. and locks precisely. I like and find Selection AF to be really useful; it uses the OK Button and Smart Dial to quickly position the (resizable using the Jog Dial) AF Frame at 15 x 11 = 165 focus areas (at the smallest AF Frame size), almost to the very edges of the screen. However, there’s no quick way to return to center position.
TIP: If you are having difficulty getting focus lock in low light, turn on Selection AF [Menu – Camera 2 – AF area – Selection AF], resize it to the smallest area [OK – rotate Jog Dial to the left, i.e. counter clockwise, until you have the smallest AF Frame] — and watch your AF success rate improve considerably.
TIP: If you like to use Selection AF as I do, don’t forget to link AE to AF [Menu – Camera 2 – Link AE to AF Point – On] which will tell the meter to take its reading wherever you’ve moved the AF Frame to. The reasoning being that you probably want the area under focus to also be correctly exposed. I find this really useful for macro photography.
Face Detection AF works well in bright lighting and will hunt in low light. It is however well implemented and once a face is detected and locked on, it will not refocus when you press the shutter release button to take the picture, even in self-timer mode. This is how it should work and you’d be surprised how many cameras get this wrong.
You can save an image in the RAW file format. It takes about 5 sec. to write a RAW image to memory card (though you can take the next one in about 2 sec.). You can also select to save a RAW+JPEG (Super Fine, Fine or Normal).
At Picture Size = Super Fine, a 20.3MP JPEG image is compressed down to anywhere between 3MB and 10MB. A RAW image occupies about 34MB!!! I could not get Intelli-Studio to recognize RAW files and I have to drag-n-drop them using Windows Explorer.
Included in the box is a rechargeable Li-ion battery BP1030 that can take about 320 shots or 110 min. of video (Samsung’s standard) on a fresh charge. A Battery Charger BC1030B (with power cord) recharges a depleted battery in approx. 140 min.
The Samsung NX210 uses the SD, SDHC and SDXC card (up to 128GB).
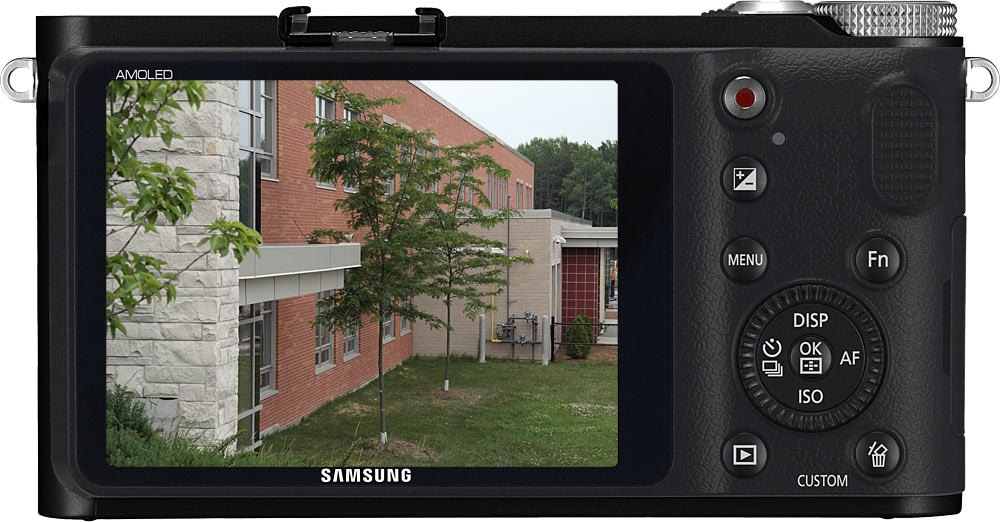
Unlike some cameras that sport a [16:9] 3.0-in. LCD (which turns out to be a [4:3] 2.5-in.), the NX210 has a real [4:3] 3.0-in. AMOLED display with a high 614k-dot resolution. The AMOLED has a fast enough refresh rate for a smooth display. The monitor’s brightness can be adjusted in MENU. The screen gains up well in low-light. The display is bright and clear enough for quite precise manual focusing, and the display info layout is one of the best I’ve used.
The NX210 features an electronic level gauge that you activate by pressing DISP (Arrow UP) on the Smart Dial (4-Way Controller). You need to get all green bars (left, center and right) to be aboslutely horizontal. The only thing I didn’t quite like is that the level gauge displays at the bottom of the screen instead of in the middle.
All the controls are to the right side of the AMOLED: dedicated Movie button, EV button, Menu, Fn, Navigation button (4-Way Controller with a scroll wheel, which Olympus calls the Smart Dial), OK button, Playback and Delete/Custom button. Samsung, unlike many camera manufacturers, seems to have perfected the size and placement of buttons and dials.
The Fn button displays a very convenient Smart Panel (Super Control Panel). What I especially like about the Smart Panel is that you simply select the setting you want to change, scroll the Jog Dial and it’s set; no need to confirm with an extra and redundant OK. The OK button brings up AF Area in shooting mode. The Navigation Button has UP = Disp, RIGHT = AF mode, DOWN = ISO, LEFT = Drive/Self-timer.
The Delete button allows you to delete one or multiple images in Playback mode. To delete all images, you need to access the Playback Menu. You can customize that button in shooting mode to: Optical Preview, One Touch WB, One Touch RAW+, Reset (to quickly reset some settings) or AEL.
Tip: If you miss a dedicated AEL button, just customize the Delete button: [Menu – Custom 2 – Key Mapping – Custom – AEL]
The Exposure Compensation button needs to be pressed and held down while you rotate the Jog Dial. I would rather it acts as a toggle button. You can customize the Bracket area and order [Menu – Camera 3- Bracket Set]. AE Bracket Set will allow you to specify bracket area and order; WB Bracket Set to bracket the White Balance; and P Wiz Bracket Set to bracket Picture Wizard Photo Styles.
The Menu button brings up a menu structured with 5 tabs and 10 screens (Camera tab with 3 screens, Movie tab with 1 screen, Custom tab with 2 screens, Setup tab with 3 screens and GPS tab with 1 screen). The Menu is easy to understand and navigate, and you never have to scroll down to find items.
In Continuous mode, you can shoot at about 8fps [it was 7fps on the NX200] in JPEG or RAW.
A couple of nice features: the hinged plastic Terminal door opens up wide to allow unimpeded access [don’t you hate fighting with a rubber flap?] to the HDMI port and USB/Shutter release port. You can optionally purchase Shutter Release SR2NX02 that plugs into the Micro USB port. The Battery/Card compartment has a latch to keep the battery from accidentally falling. The tripod socket at the bottom is metal and is centered with the camera but not inline with the lens; you will not be able to change battery or card when the camera is on a tripod.
Improvement Handling & Feeling suggestions:
- Need a built-in Flash
- Need a tiltable LCD
- Some people need a Hi-res EVF
- Bigger grip would be better when using longer and heavier lenses
- Tripod socket that is both centered and inline
Just like the NX200, the Samsung NX210 is a nicely built compact mirrorless DSLR with all the important functions accessible from a dial or control button. It’s extremely well thought out with very good handling and build. It’s quite intuitive to use and the enthusiast photographer will find lots to like in the handling and ease-of-use of the Samsung NX210.
Next: Samsung NX210 User’s Experience
Related Links:


